Overview
Introduction
Tracer is a time tracking tool developed to enable simple, easy time logging for people and organisations working across multiple projects.
You can access Tracer here: Nodehex/Tracer
This is a toolbox module, as such, it is in active development but is deployed to the platform to allow users to test functionality, provide feedback and request features for free during development.
Please note that elements related to the product, including documentation are likely to rapidly change during the test period.
Security
Tracer does not send any data that is written in the browser to any remote device. Any data provided to your browser will be saved locally on the users hardware and Nodehex have no access or control over that data.
You can read more about this in our Security documentation.
Quickstart instructions
Navigating to the toolbox
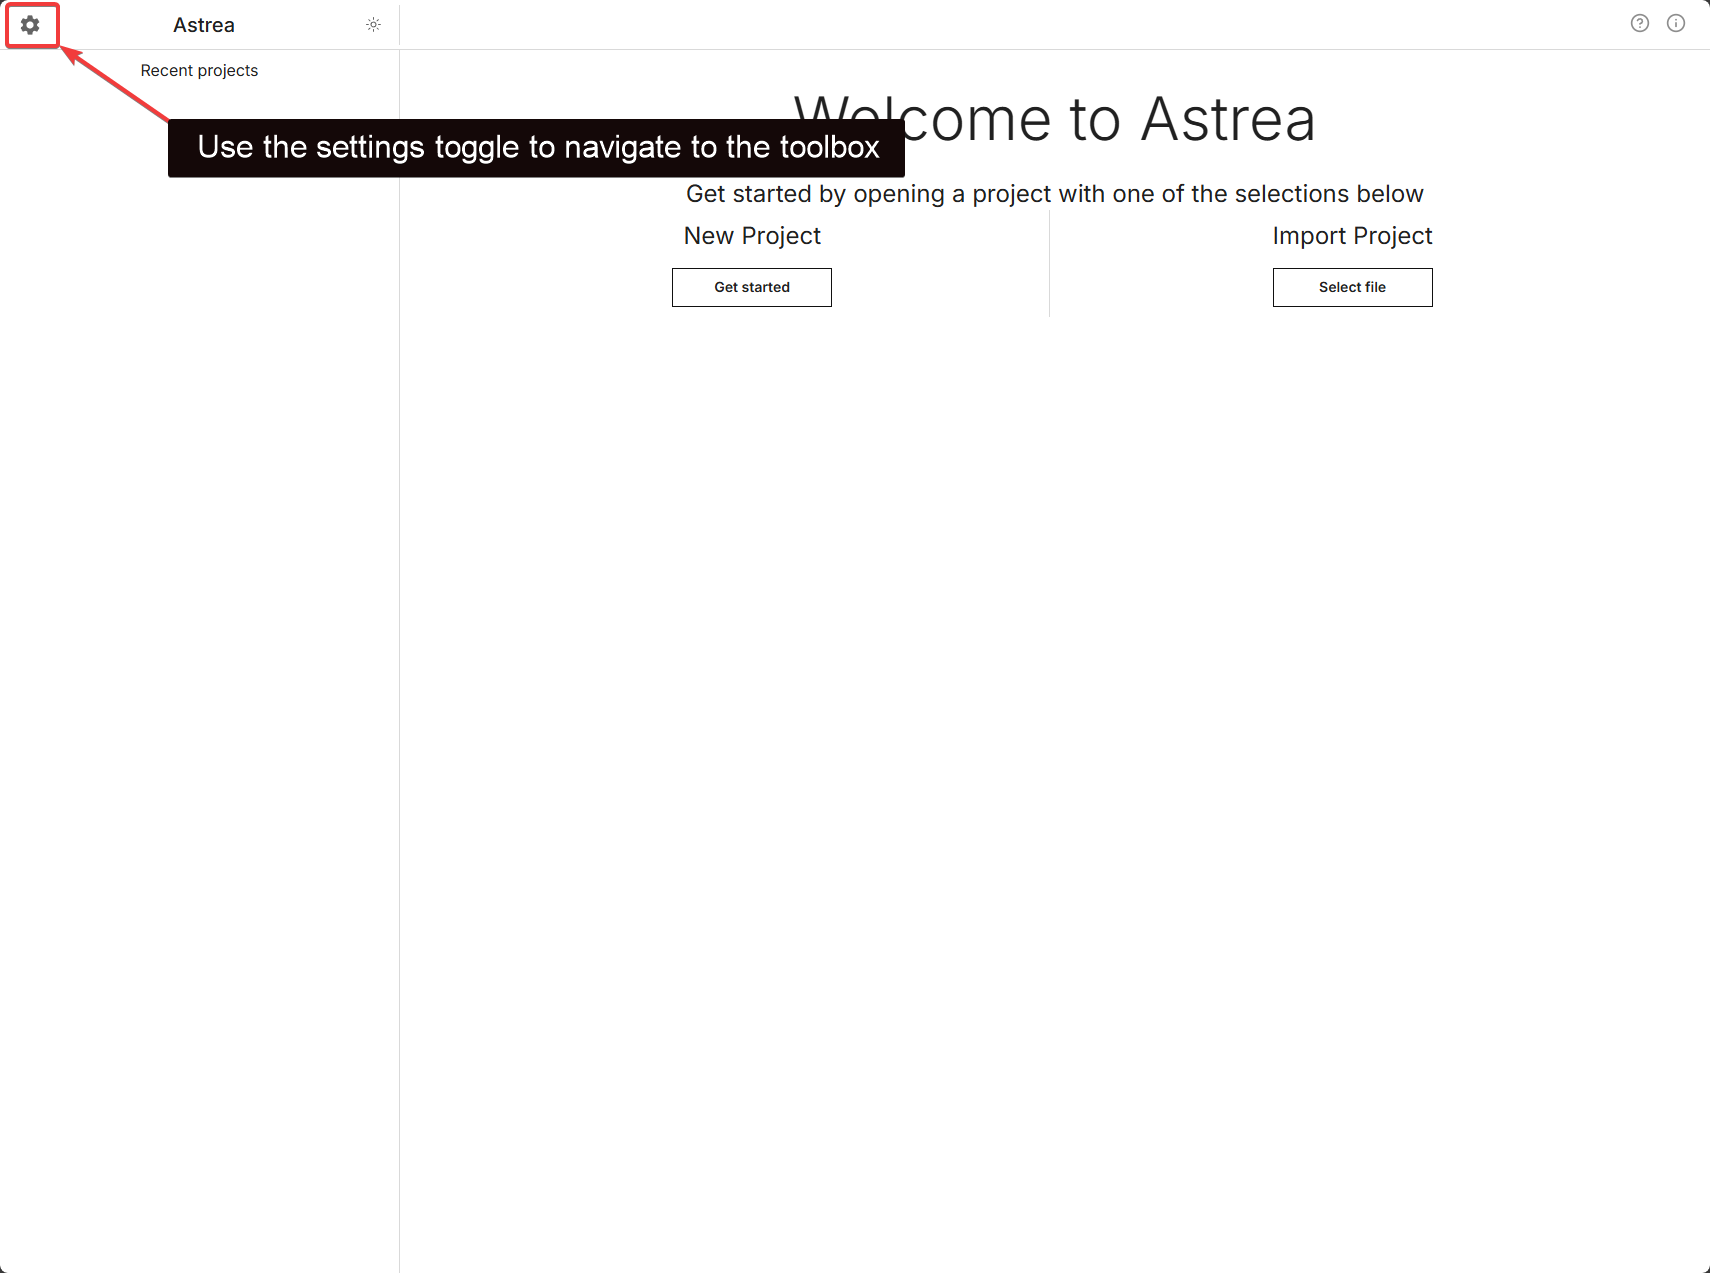
What is the toolbox?
The toolbox area contains all of our test applications that are currently in development but are available for users to actively provide feedback, test or suggest features for.
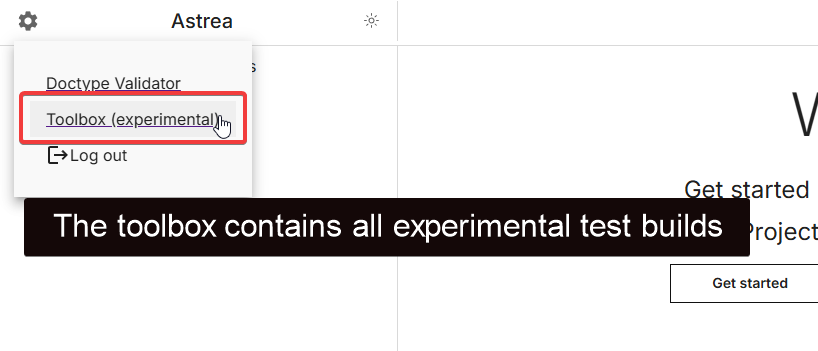
Navigating to Tracer

Setup - User configuration
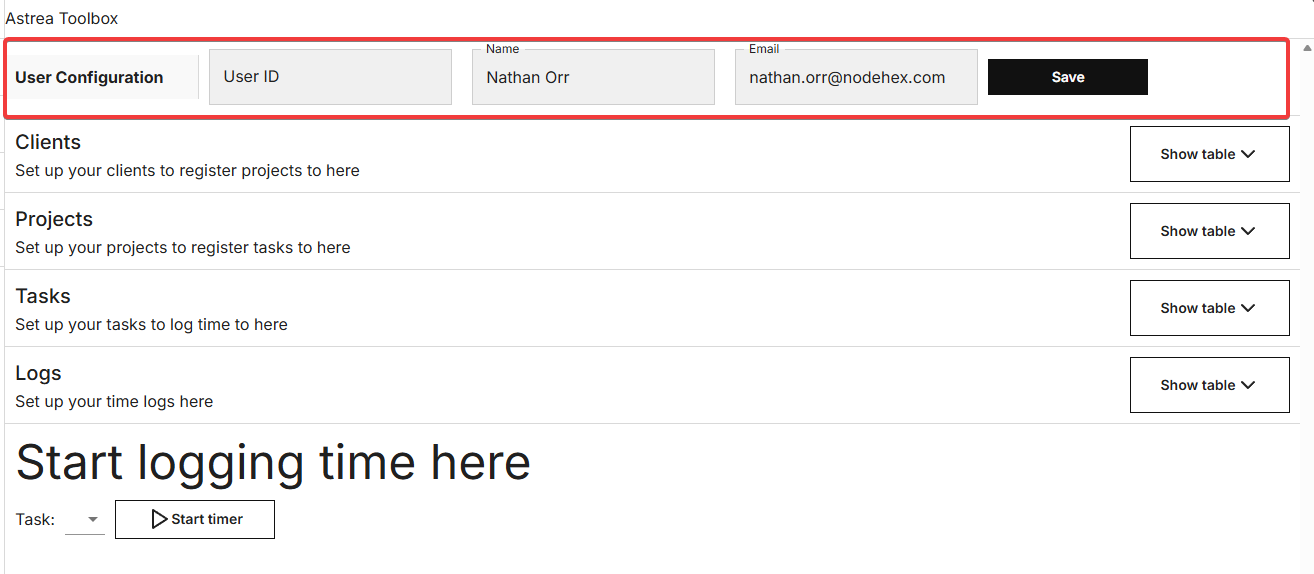
Setup - User configuration
First, a user has to be created, populate the fields with your user information.
| Field | Description |
|---|---|
| User ID | This is your unique identifier, we recommend this be the same as your internal user ID |
| Name | Your user name |
| Your work email |
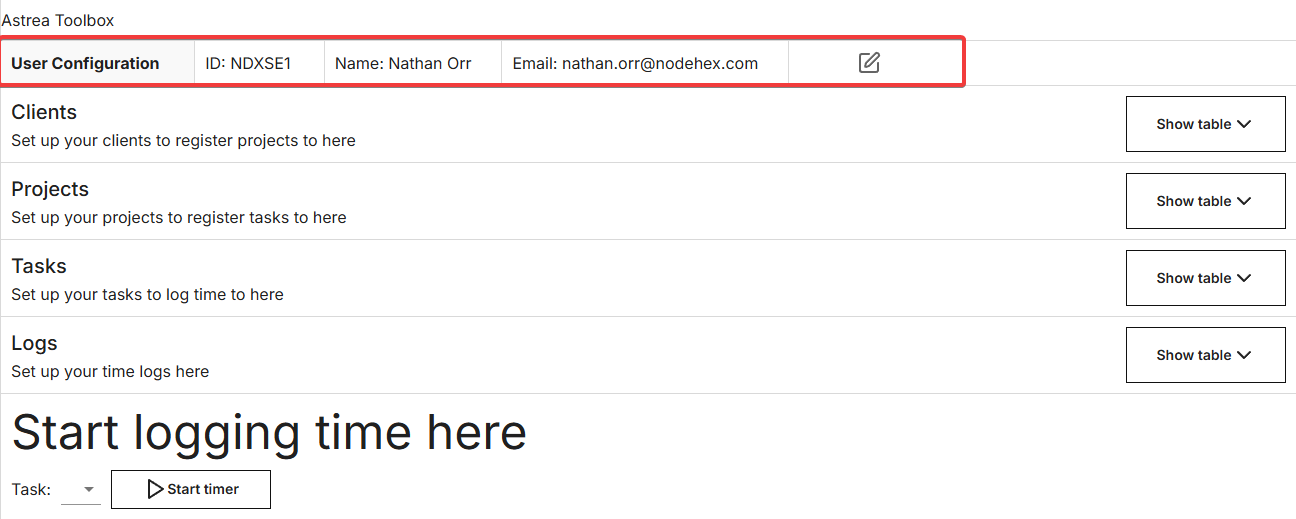
Once user configuration is completed and in place, the field will lock, you can edit this if you wish once saved, but we recommend utilising the same information each time.
Completed user form:
Setup - Configuring a field
To begin configuring any field, click the corresponding + icon to begin editing the field and adding new values.
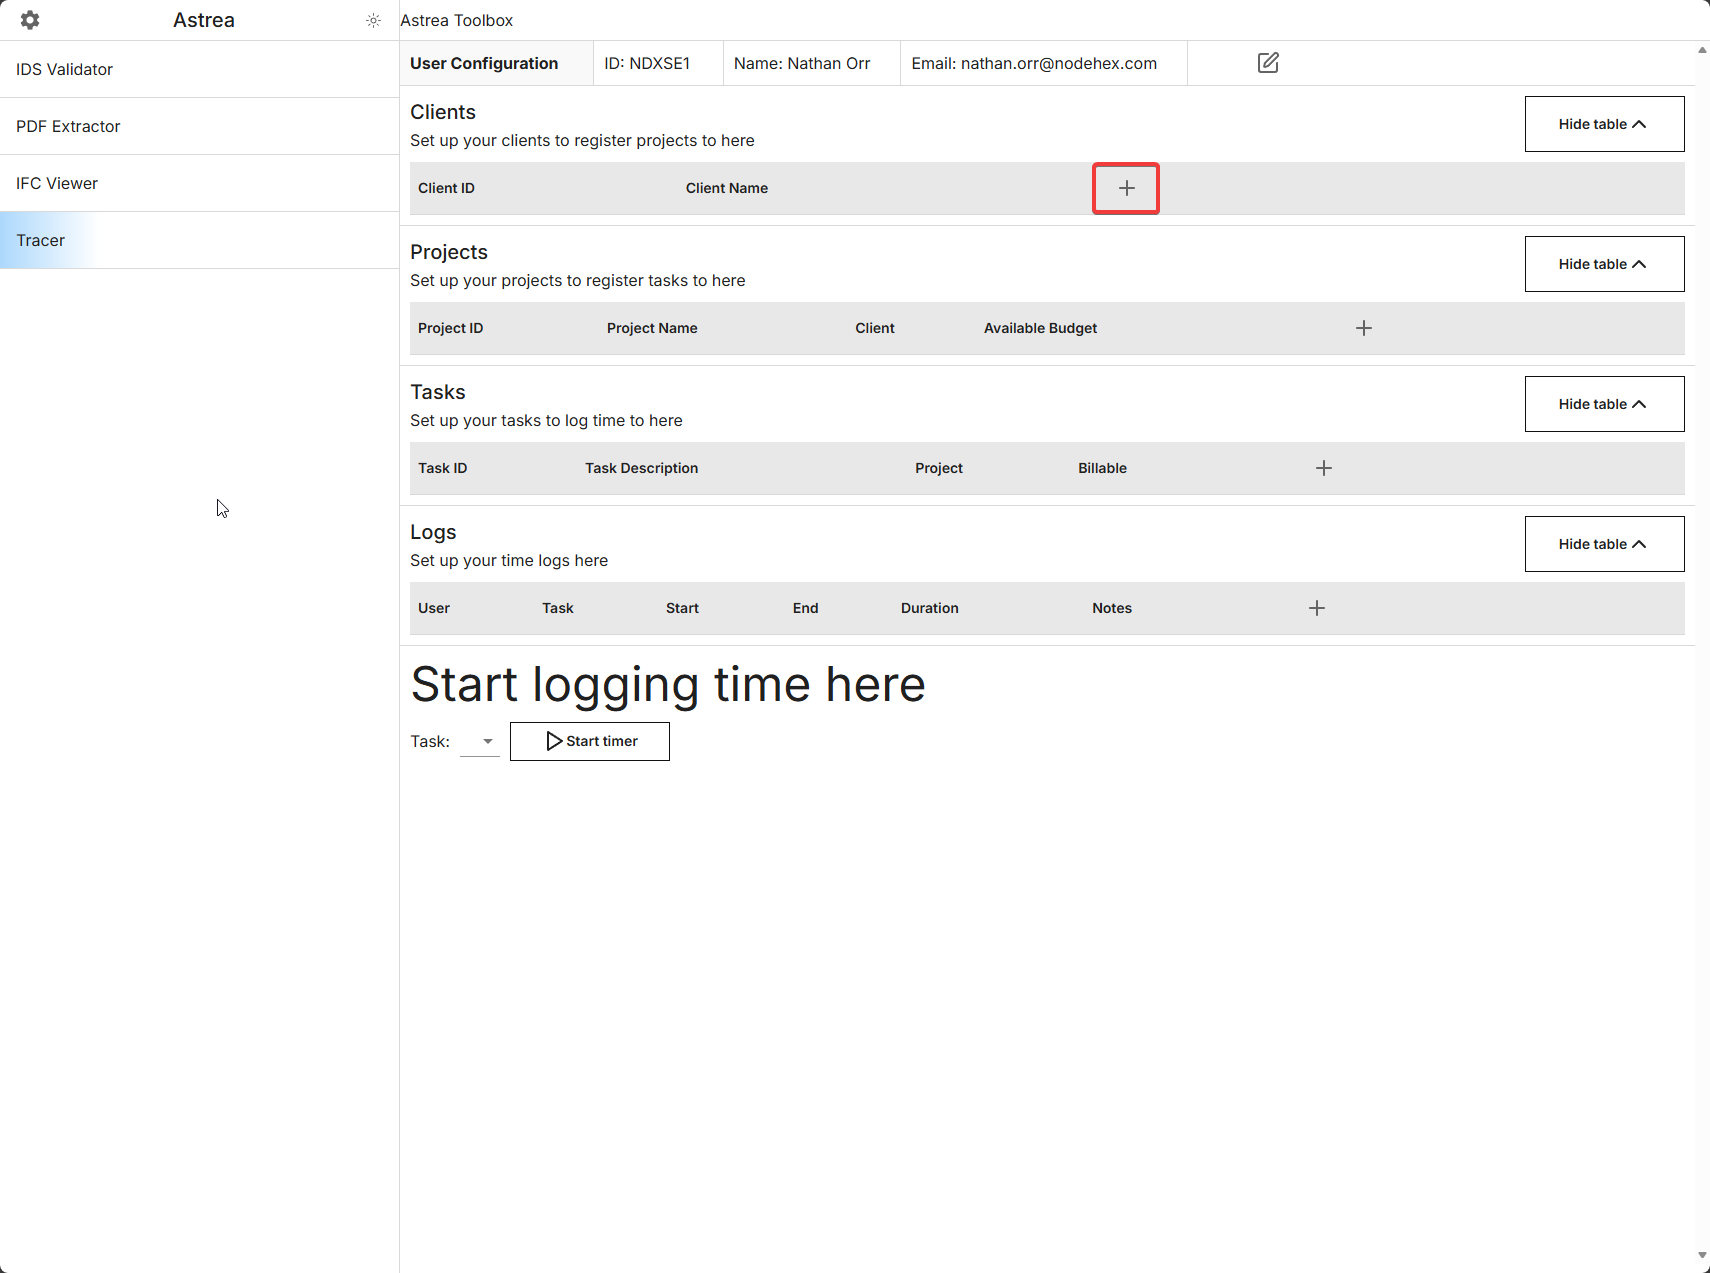
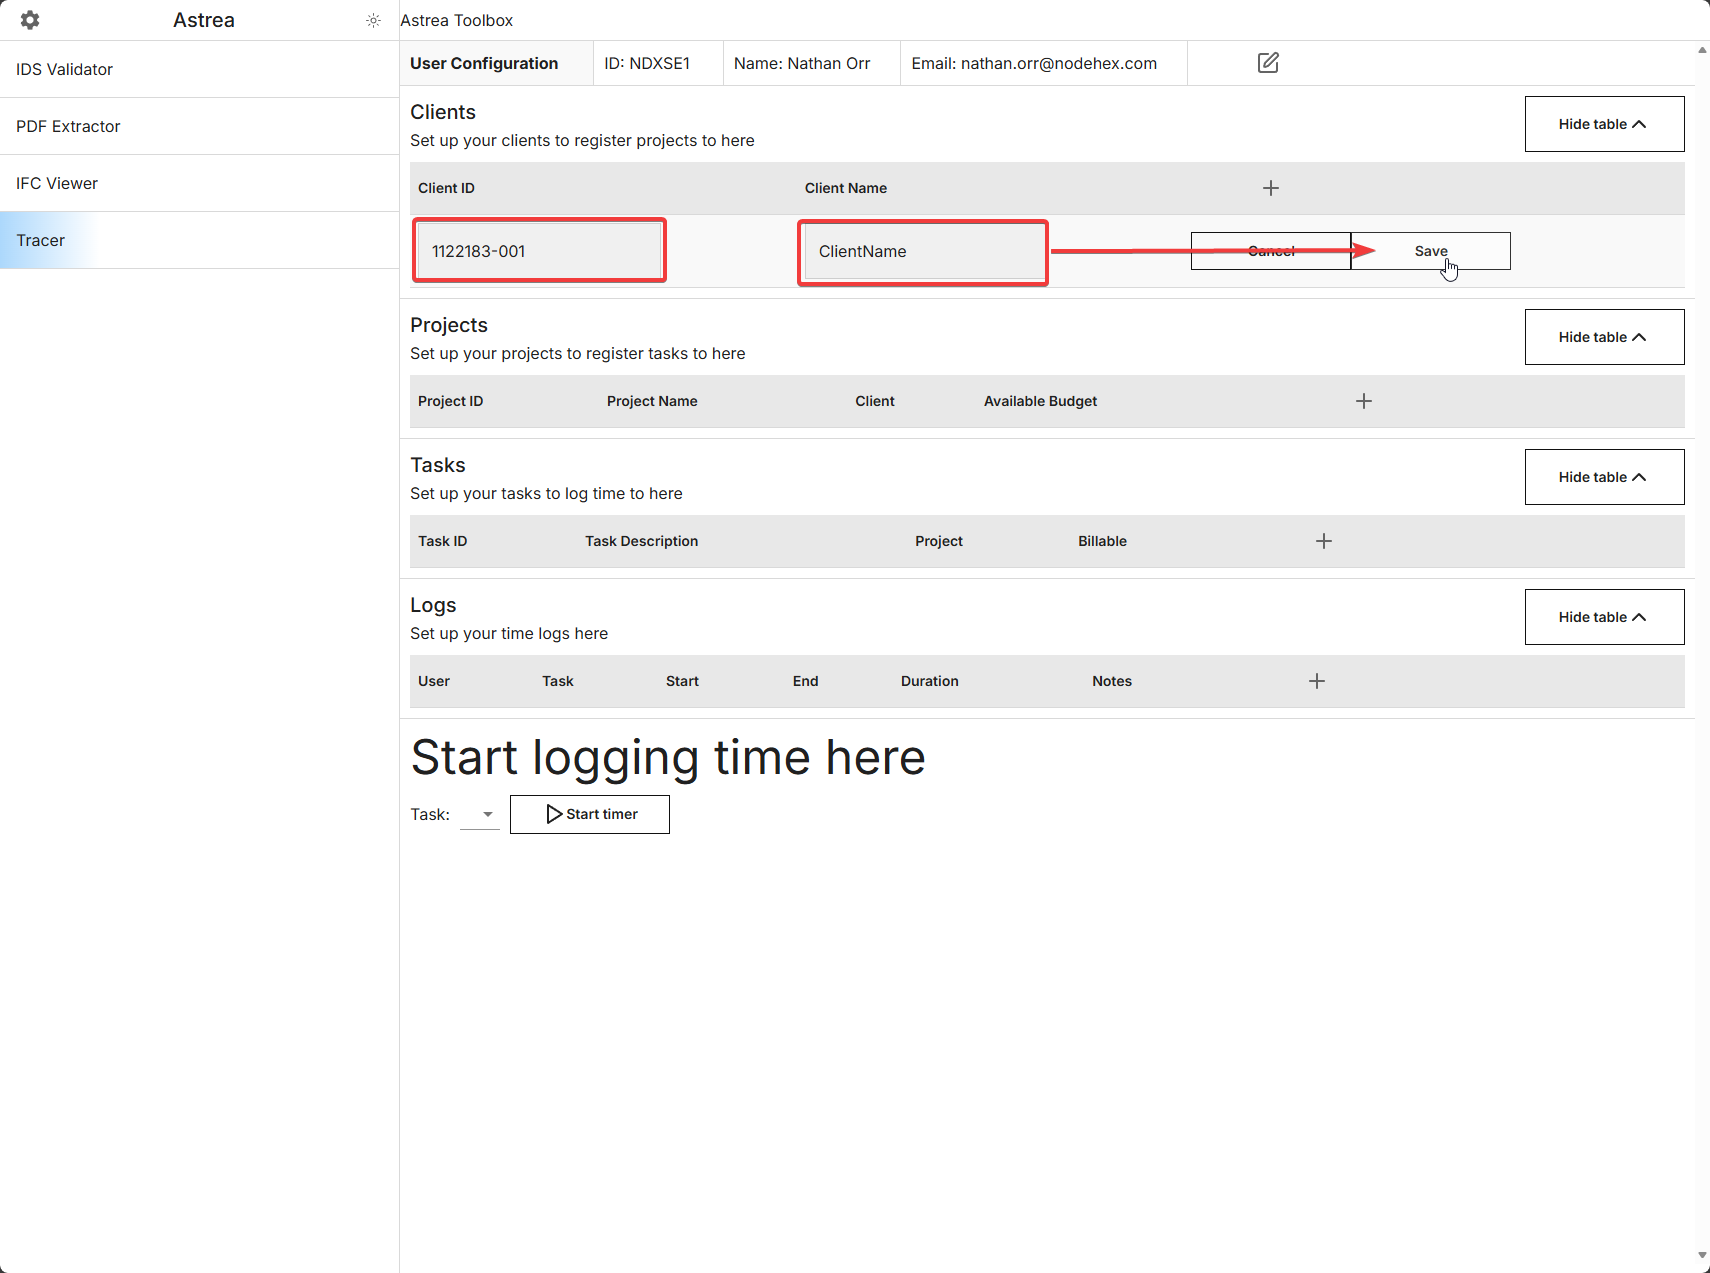
Setup - adding a client
To add a client, click the + to open the form and begin populating the fields
| Field | Description |
|---|---|
| Client ID | Unique identifier for the client |
| Client Name | Name of the client |
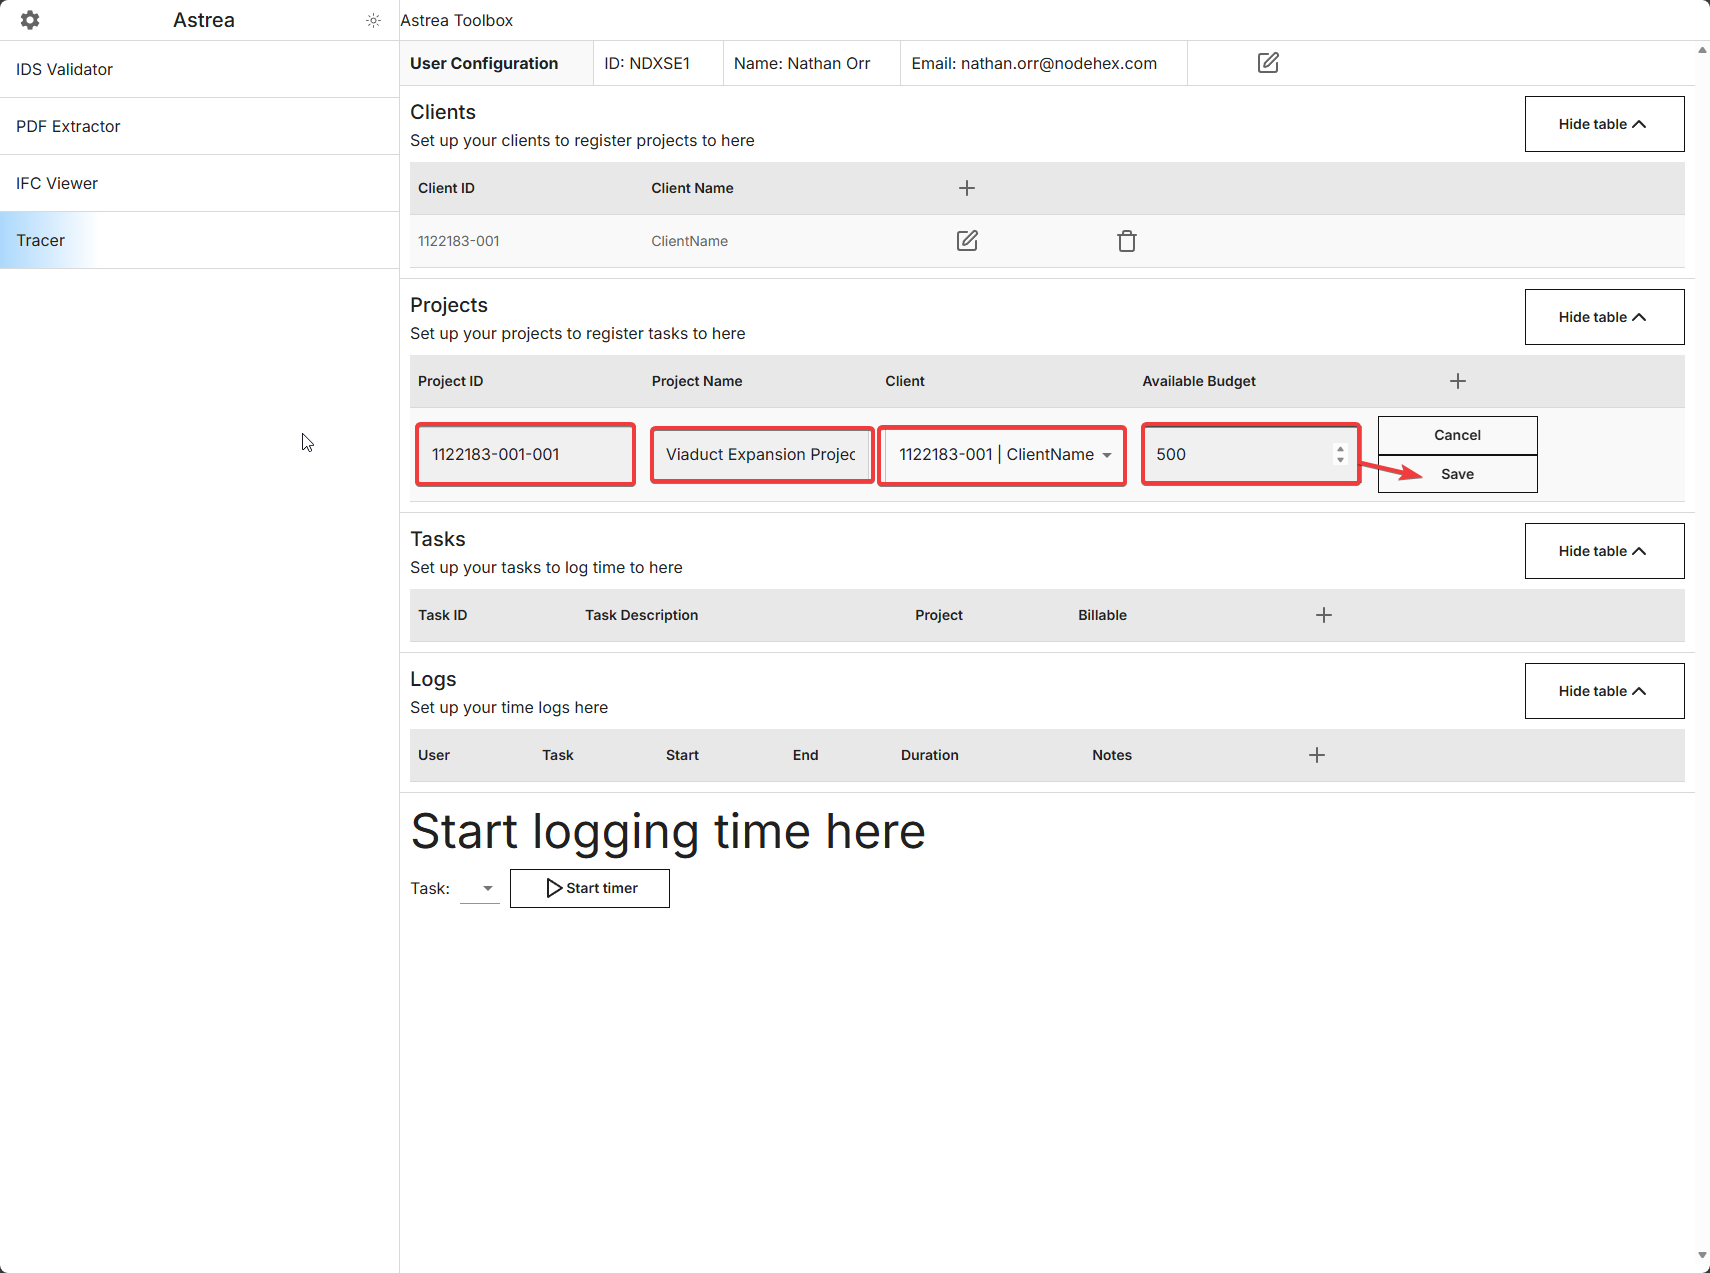
Setup - adding a project
To add a project, click the + to open the form and begin populating the fields
| Field | Description |
|---|---|
| Project ID | Unique identifier for for the project, we recommend using your internal timecode for the project ID |
| Project Name | Name of the project |
| Client | The client this project is associated to |
| Available Budget | Total number of budget hours for the project |
A task must be associated to a project
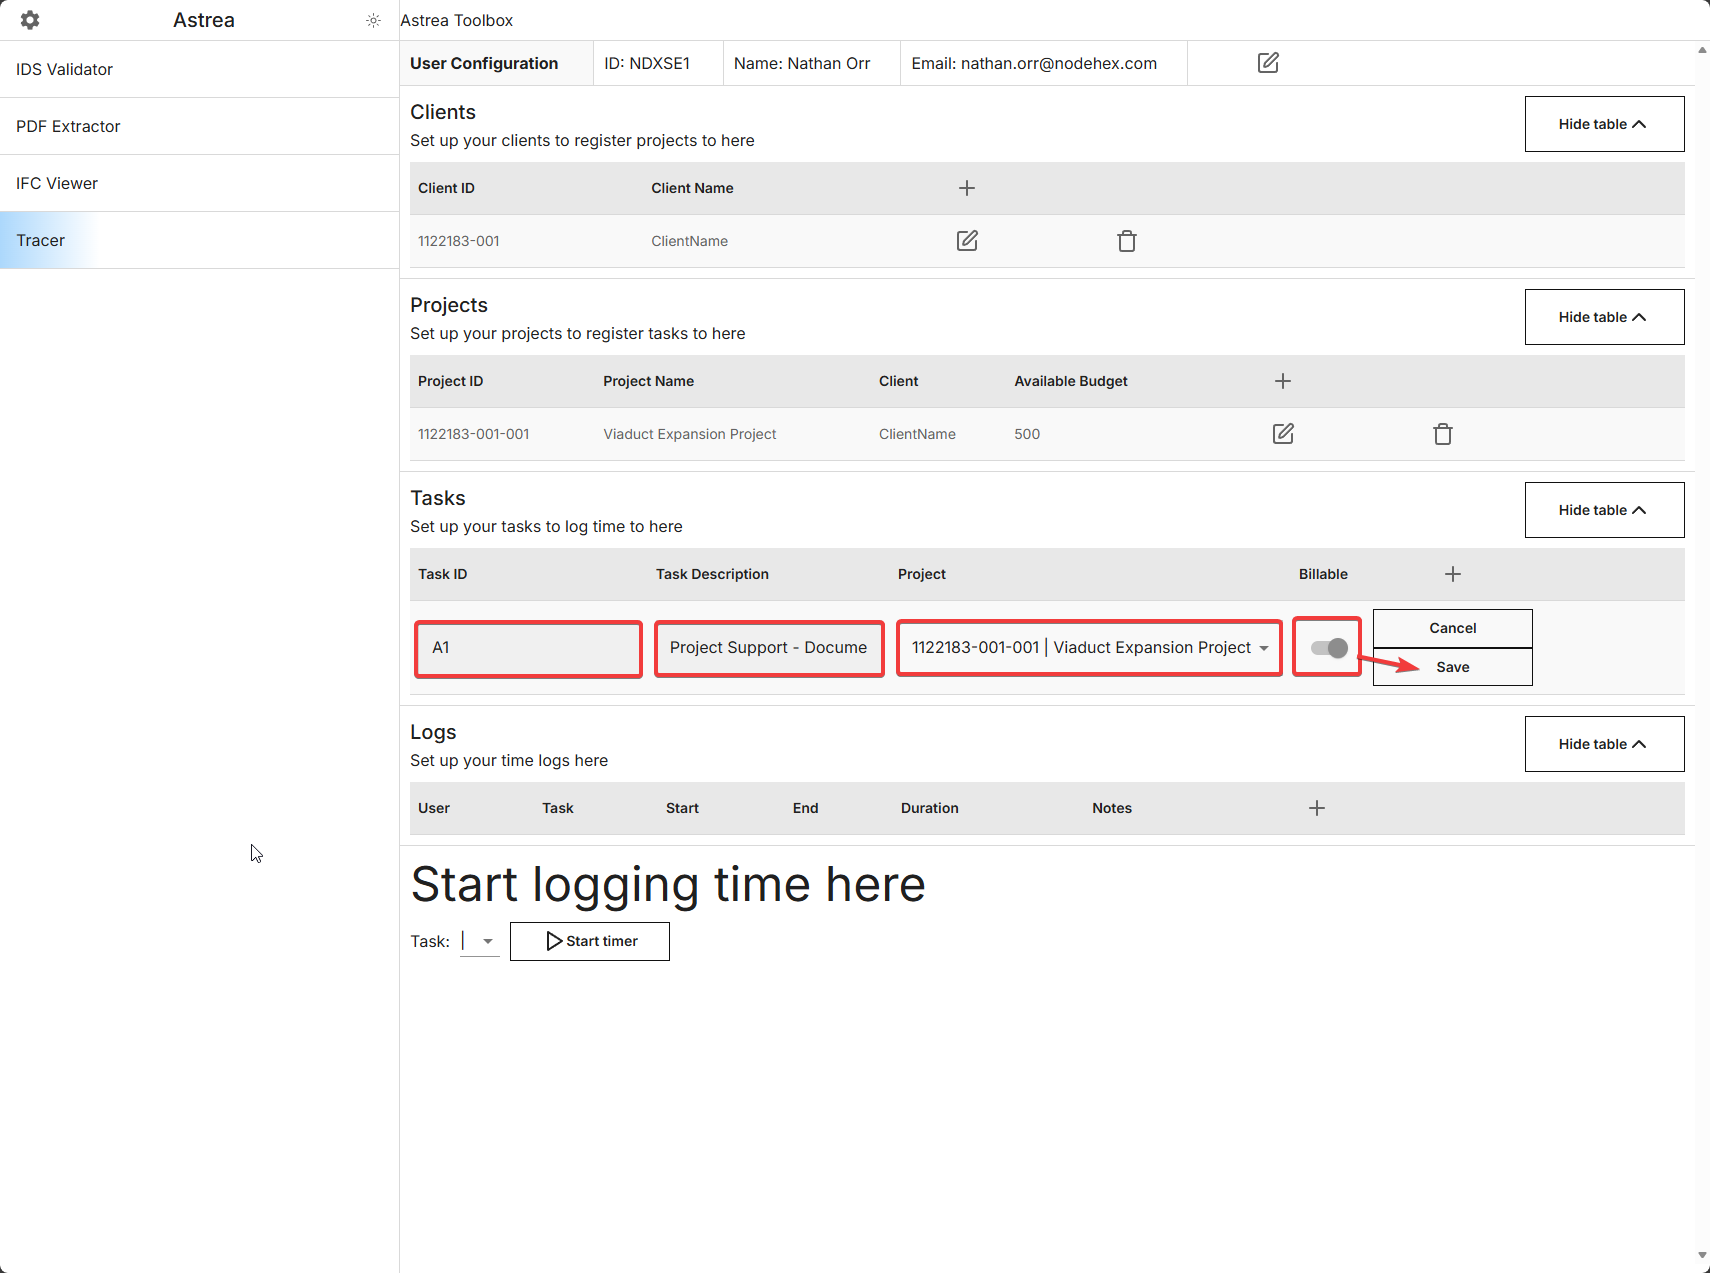
Setup - adding a task
To add a task to a project, click the + to open the form and begin populating the fields
| Field | Description |
|---|---|
| Task ID | Unique identifier for the task, we recommend using your internal task code for the task ID |
| Task description | Description of the task, we recommend using your internal task description for this |
| Project | Which project this task is associated to. |
| Billable | Toggle to identify billable vs non-billable time |
A task must be associated to a project
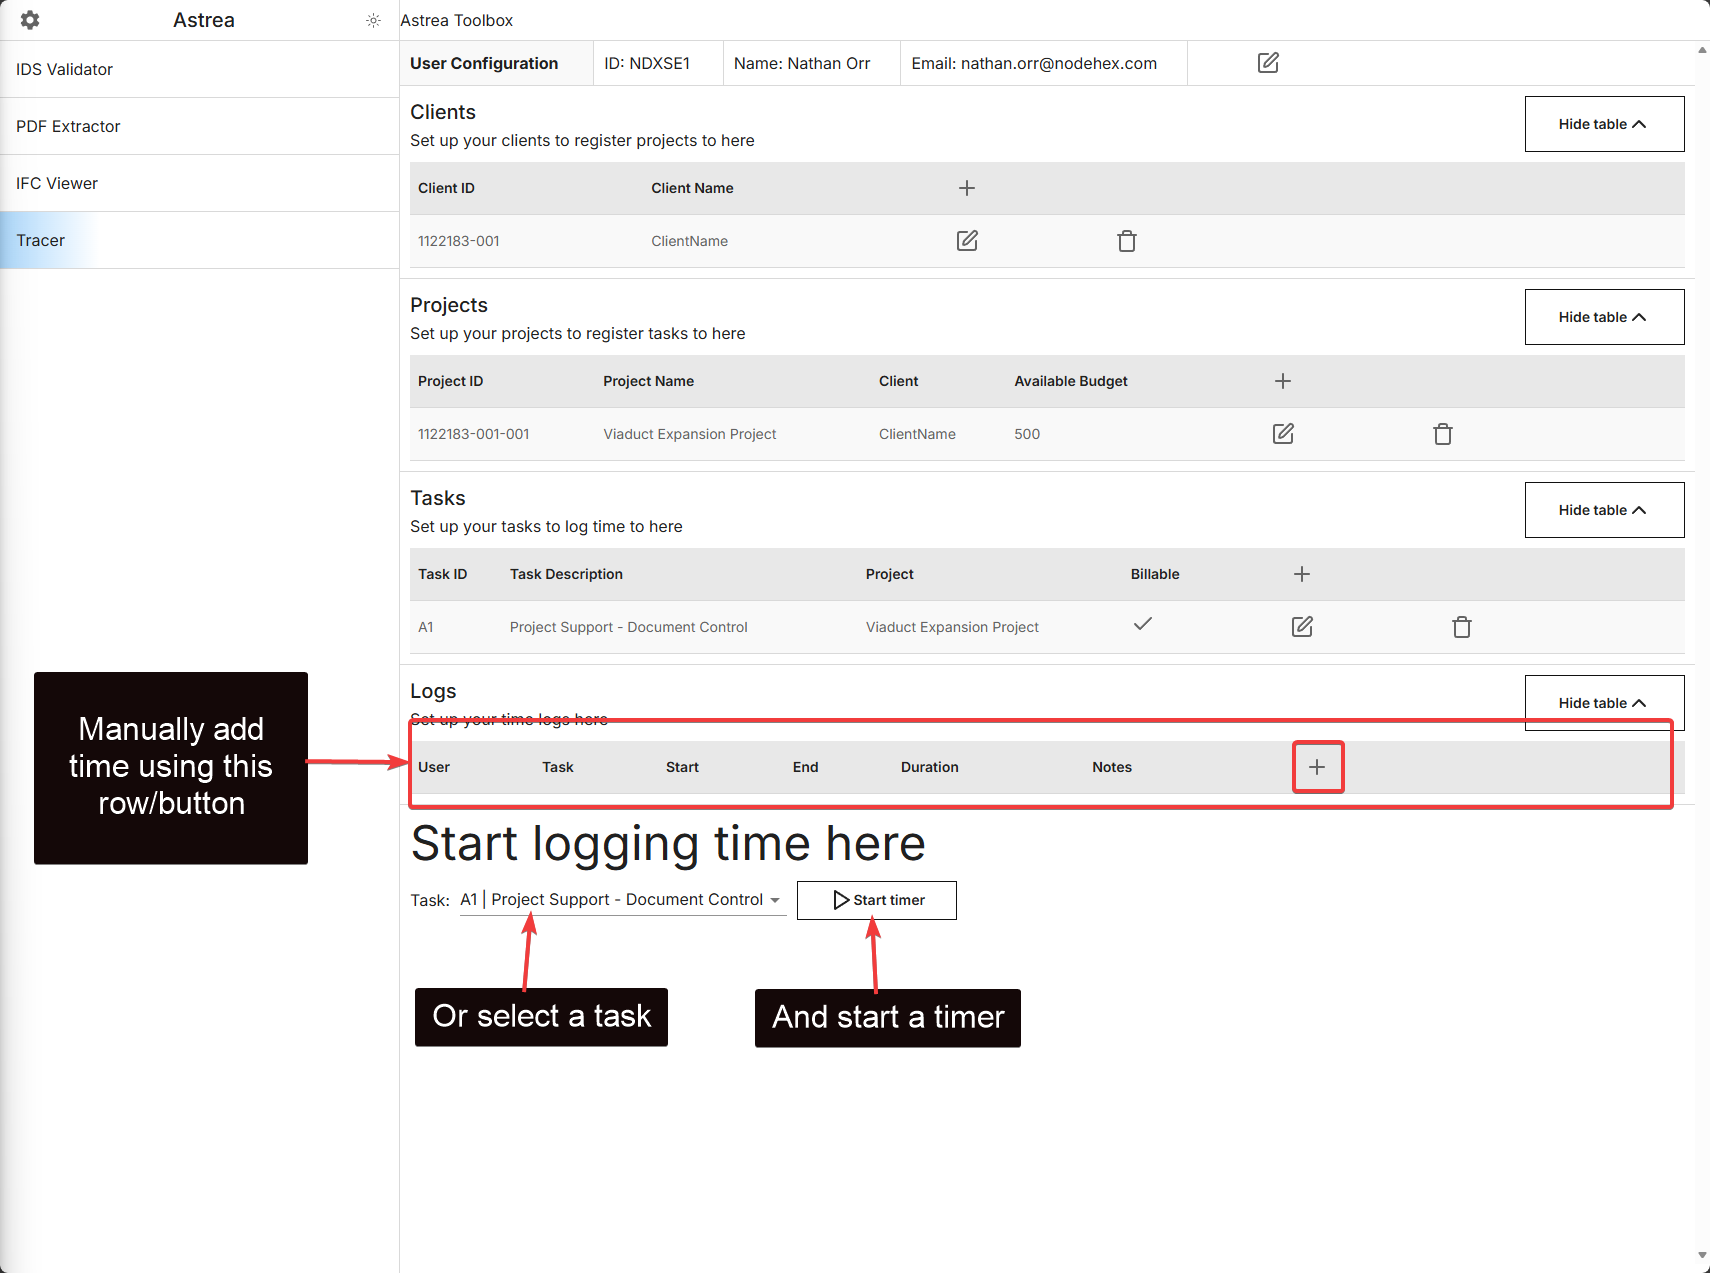
Start logging time
Manually add time
You can add time using the plus icon + which will bring up a dialogue for adding/removing blocks of time
Automatic timer
You can start and end a timed logging session, which will track time spent automatically
Please note, the information on this page is in active development, as such, documentation and the application itself may change